
Featured Youtube Video

My Latest Instagram Post
Instagram did not return a 200.Categories
- About Me (3)
- Adoptable Pups (1)
- All Things Ava (1)
- Aviation Weather (8)
- Beauty & Fashion (2)
- Business of Aviation (2)
- Child Sexual Abuse (2)
- Cross Country Flying (8)
- Dangerous Drugs (4)
- Dog Rescue (3)
- FAA Dispatcher Exam Prep (3)
- Favorite Things (7)
- Flying Lessons (25)
- Grieving (1)
- Holiday Fun (2)
- Home Decor (2)
- Hotel Reviews (1)
- IFR Written Test (3)
- Inspiration (4)
- Instrument Checkride Preparation (5)
- Legal Marketing (7)
- Life with a Toddler (6)
- Motivation (3)
- Movies (2)
- Music (3)
- Personal Injury Law (6)
- Private Pilot Exam (12)
- Recipes (2)
- Song Meanings (1)
- Taylor Swift (1)
- The Bachelor (1)
- VOR (1)
- Work Travel (1)
Recent Posts
- Save Energy and Save Money ~ Get $10 When you Sign up with OhmConnect!
- 2018 Review: Sheffield School of Aeronautics – Dispatch School in Fort Lauderdale
- Kitchen Table Sanding & Refinishing Project – Dewalt Sander and Minwax Stain
- Pokolodi Lodge Review – Aspen Snowmass, CO
- Aircraft Dispatcher Exam: Lesson Two (Aerodynamics and Aircraft Systems) – Wing Lift Devices
| M | T | W | T | F | S | S |
|---|---|---|---|---|---|---|
| « Jun | ||||||
| 1 | 2 | 3 | 4 | 5 | 6 | 7 |
| 8 | 9 | 10 | 11 | 12 | 13 | 14 |
| 15 | 16 | 17 | 18 | 19 | 20 | 21 |
| 22 | 23 | 24 | 25 | 26 | 27 | 28 |
| 29 | 30 | |||||
Categories
- About Me
- Adoptable Pups
- Aerodynamics and Aircraft Systems
- All Things Ava
- Aviation Weather
- Beauty & Fashion
- Business of Aviation
- Child Sexual Abuse
- Cross Country Flying
- Dangerous Drugs
- Dog Rescue
- FAA Dispatcher Exam Prep
- Favorite Things
- Flying Lessons
- Grieving
- Holiday Fun
- Home Decor
- Hotel Reviews
- IFR Written Test
- Inspiration
- Instrument Checkride Preparation
- Legal Marketing
- Life with a Toddler
- Motivation
- Movies
- Music
- Personal Injury Law
- Private Pilot Exam
- Recipes
- San Bernardino City Shelter
- Song Meanings
- Taylor Swift
- The Bachelor
- VOR
- Wing Lift Devices
- Work Travel
Instrument Checkride Prep: Reading and Interpreting the METAR
I’m taking the instrument check ride next month and I’m going to be blogging nightly on different topic in preparation for all of the stuff I think will come up on the oral part. I am preparing for lots of aviation weather talk, so at least the next week will be over those topics. I will have to explain things like the difference between a stable and an unstable atmosphere, what standard temperature and pressure values are, and the two basic ways that fog may form.
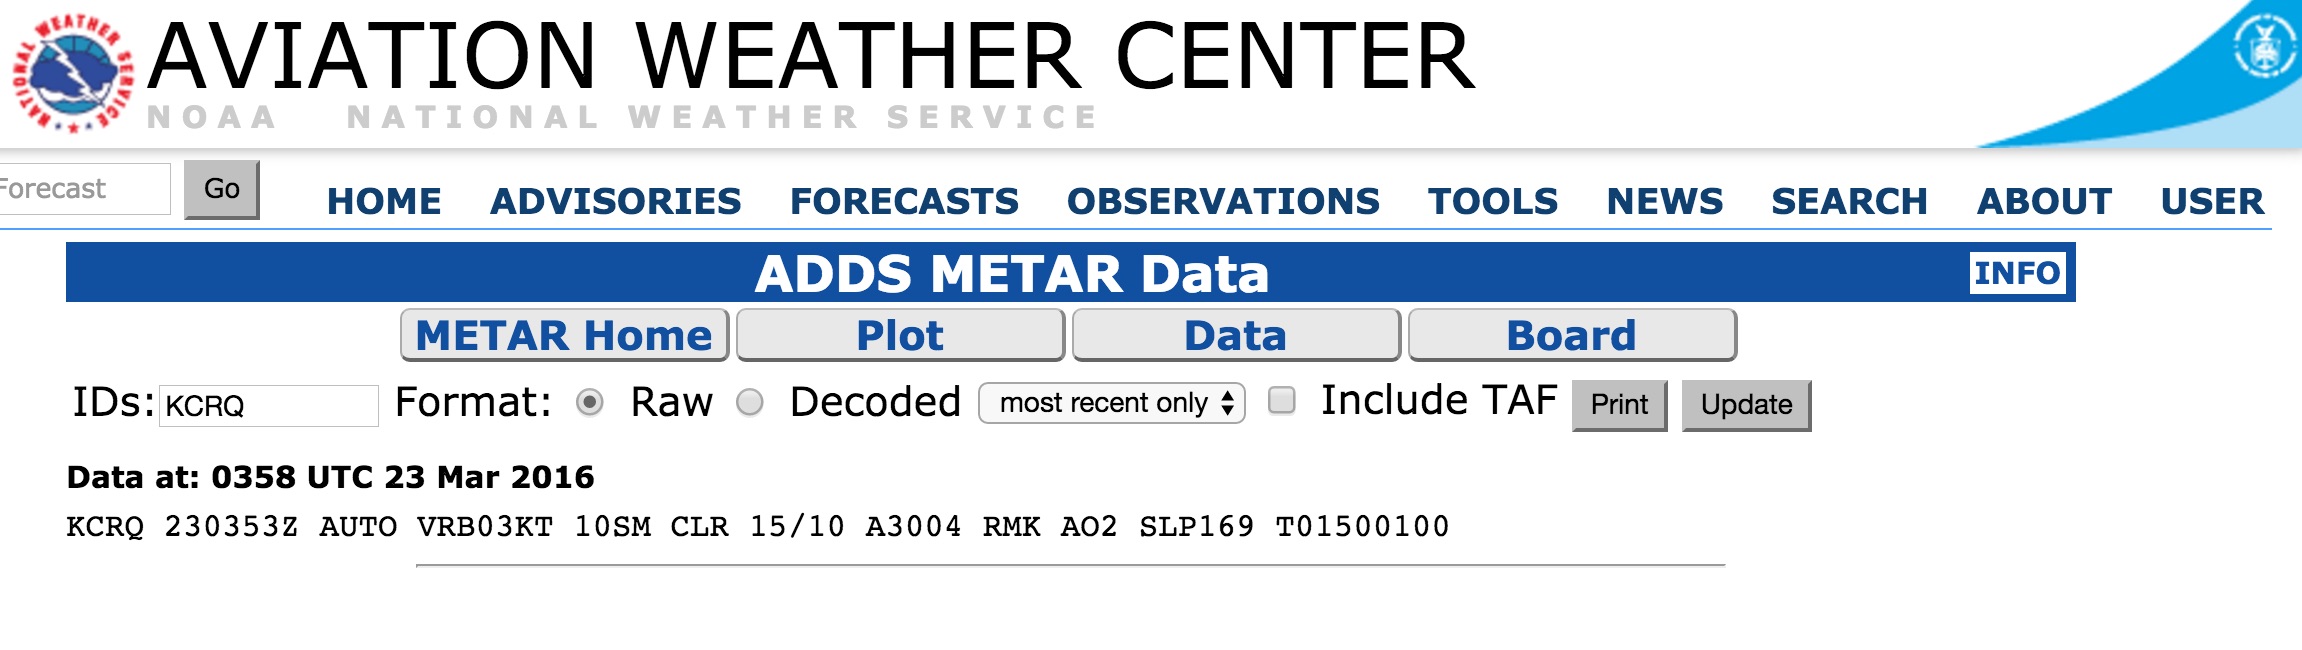
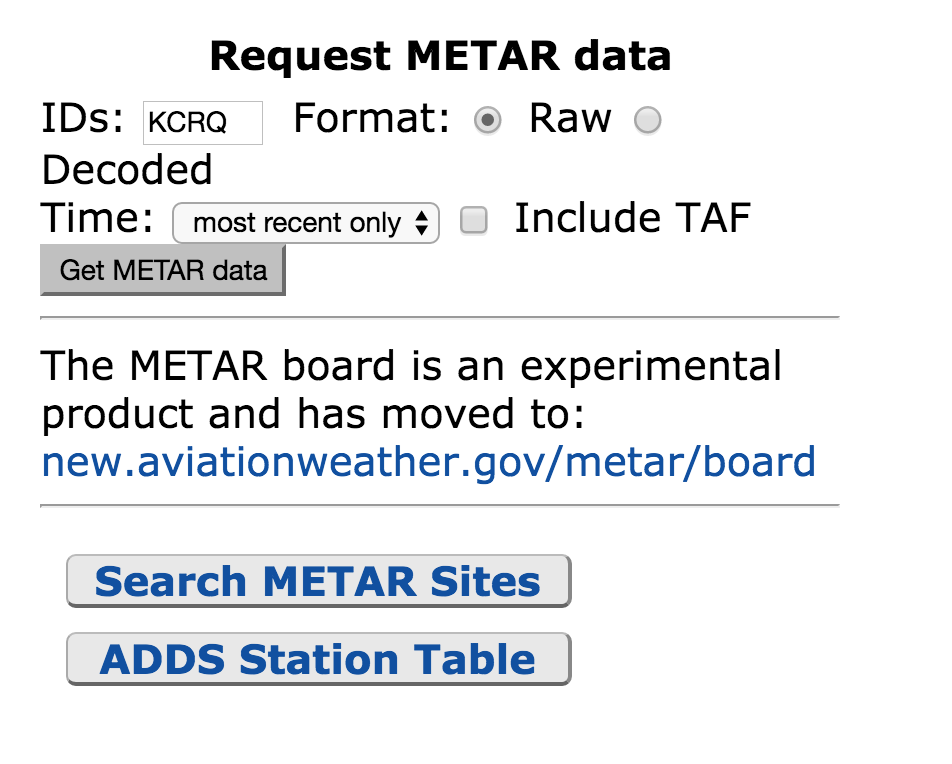
One very basic thing I will have to do is hop on aviationweather.gov and read and interpret a METAR. The first thing I will do is going to aviationweather.gov and click on METAR – it’s in the upper left hand corner of the website. Then I will scroll down to near the bottom of the page – on the right, where it says “Request Metar Data”, and I’ll type in the identifier of my airport – in this case KCRQ.
The METAR reads: Data at: 0358 UTC 23 Mar 2016 KCRQ 230353Z AUTO VRB03KT 10SM CLR 15/10 A3004 RMK AO2 SLP169 T01500100

Here’s how I’d read this: Airport is KCRQ, Carlsbad, CA Time – 23nd of March at 03:58 Zulu Time. I convert the time and it’s the 22nd of march at 20:58 Pacific Daylight time. The AUTO, when it appears just after the time group, means that the observation is from an automated station. Winds are light and variable at 3 knots, visibility is 10 or more statute miles, sky is clear, Temperature is 15 degrees, Dew Point is 10 degrees. Remarks: A02 means the station has a precipitation discriminator. SLP stands for Sea Level Pressure, which is another measure of atmospheric pressure. The Last digits that start with a “T” are the he hourly air and dewpoint temperatures to the nearest 1/10 C degree.
Tomorrow night I think I will review the Winds and Temperature aloft chart, and what valuable information can be determined on there, like the most favorable altitude, areas of possible icing, temperature inversions, and turbulence.
What is WAAS (in Aviation)? Explaining it for the Instrument Checkride
In the instrument checkride (next month – eeeek!) I know I’m going to have to talk about instrument approaches, GPS approaches and will be prepared to explain how a GPS works. And I’ll probably be asked about WAAS. What the heck is it? I know what WAAS is because I’ve been eyeing a ForeFlight Stratus for Echo Sierra – and it has WAAS!
WAAS stands for Wide Area Augmentation System, and it’s a nice system of satellites and ground stations that give GPS signal corrections in a timely manner (every 5 seconds or better), to give better accuracy. Garmin says WAAS capable receiver can give position accuracy of better than 3 meters, 95% of the time. Foreflight says you frequently see 1 meter accuracy or better. Essentially, WAAS is intended to enable aircraft to rely on GPS for all phases of flight, including precision approaches to any airport within its coverage area.
Another great thing about WAAS is almost around the clock availability. If you want to get technical, availability is the probability that a navigation system meets the accuracy and integrity requirements. The WAAS specification mandates availability as 99.999% throughout the service area. This is equivalent to a downtime of just 5 minutes a year. That’s pretty awesome, especially considering before WAAS, GPS specs allowed system unavailability for as much as a total time of four days per year.
Checking the Sensitivity of the VOR Receiver (for the IFR Written Test)
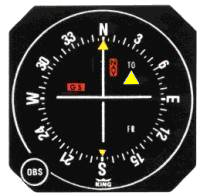 Let’s talk about radio navigation, VOR’s, and OBS’s. Three of my favorite things! There are quite a few questions on the IFR written about VORs. And there is one particular question on the IFR written test about checking the sensitivity of a VOR receiver, and how many degrees in course change there should be as the OBS s rotated, all the way, right or left. This is not the same as checking the accuracy of a VOR (you need to check the accuracy this every 30 days if you’re flying IFR). You turn the knob to move the course deviation indicator (CDI) from the center all the way over to the last dot on either side. The selected course should not exceed 10 degrees or 12 degrees on either side. Each dot on the CDI represents 2 degrees.